What Is a Hoop Barn?

Hoop barns go by many names, but they all point to the same smart agricultural solution. Commonly called hoop buildings, fabric barns, or tensile structures, they fall under technical categories such as fabric tension buildings and membrane structures, and may also be referred to as tarp barns, canvas sheds, or fabric arch buildings depending on the region. Despite the different terminology, they all describe a curved steel-frame structure covered with tensioned fabric, designed to create a clear-span interior with no support posts, maximizing usable space while allowing natural light and efficient ventilation for modern farming operations.
For a deeper technical understanding of tensile and fabric-based structures, see this academic overview from USC.
Table of Contents
What Is a Hoop Barn?
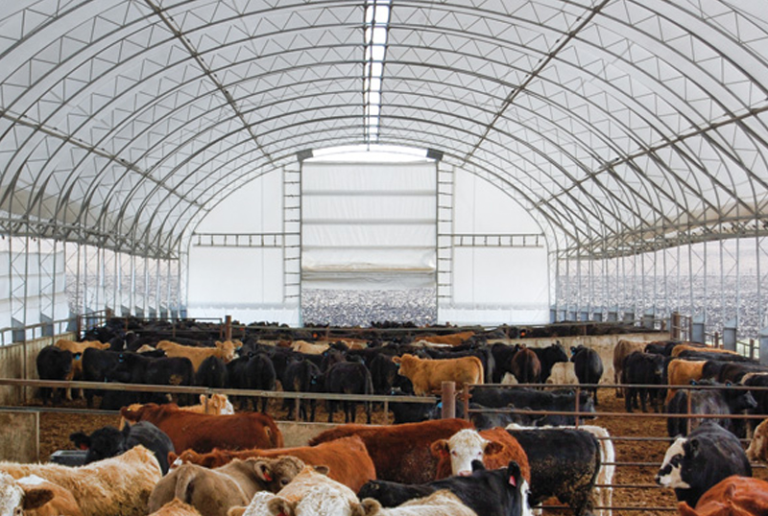
A hoop barn is a curved agricultural structure typically built using steel arches covered with durable fabric or metal panels. These buildings are widely used for livestock housing, hay storage, equipment protection, and general farm operations because they are more affordable and faster to build than many traditional barns.
One of the biggest advantages of hoop barns is the environment they create inside. Unlike conventional metal buildings that can feel dark and enclosed, fabric-covered hoop barns allow soft natural light to pass through the structure. This creates a brighter and more comfortable space for both animals and farm workers while also reducing daytime electricity use. Their open design and natural airflow also help improve ventilation, which is especially important for livestock operations.
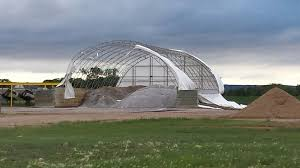
However, real-world performance depends heavily on proper installation and planning. In windy areas, poorly tensioned fabric can create noise and unnecessary wear over time. In snowy regions, hoop barns also shed snow rapidly, meaning site drainage and surrounding clearance must be carefully planned to avoid buildup around the structure.
What Is a Hoop Barn Kit?
A hoop barn kit is a pre-engineered package that includes all the structural materials and components required to construct a hoop barn, typically consisting of galvanized steel framing, fabric covers or metal panels, anchoring systems, hardware, and installation parts designed for agricultural use. These kits simplify the building process by offering ready-to-assemble systems that can often be customized based on livestock requirements, storage needs, climate conditions, and available site space, making them a practical and efficient solution for modern farm construction.
For a deeper breakdown of installation, fabric replacement, durability, and long-term ownership considerations, explore our complete guide to hoop barn kits.
Difference between Hoop Barn vs Hoop Barn Kit?
A hoop barn is the finished agricultural structure itself, while a hoop barn kit refers to the packaged materials and components used to build that structure.
Hoop Barn vs. Pole Barn: Which is Right for You?
Before you dig a single hole, you need to know if a hoop building actually fits your needs.
| Feature | Hoop Barn (Fabric) | Pole Barn (Wood/Metal) |
| Upfront Cost | $7 – $15 per sq. ft. | $25 – $50+ per sq. ft. |
| Installation Time | 2–5 Days | 2–4 Weeks |
| Natural Light | Excellent (Diffused sunlight) | Requires windows/lights |
| Longevity | 15–25 years (Cover) | 40+ years |
| Best For | Livestock, Hay, Machinery | Workshops, Garages, Housing |
The Verdict: If you need a massive amount of square footage for a low price, the hoop barn wins. If you want a “forever building” that you can fully insulate and finish like a house, stick with a pole barn.
How a Hoop Barn Works (Structural Overview)
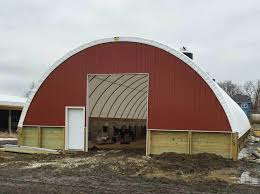
A hoop barn is engineered using a series of arched steel ribs that are anchored securely into the ground or foundation system. These ribs form the skeleton of the building, which is then covered with a tensioned fabric membrane or rigid panel system.
A typical hoop barn system includes:
- Galvanized steel arch frames for corrosion resistance and strength
- High-tension fabric or metal covering designed for weather protection
- Anchoring system (augers, concrete footings, or base rails)
- End walls (open, partially enclosed, or fully enclosed configurations)
- Ventilation features such as roll-up sides or ridge vents
- Optional access doors for machinery or livestock movement
The curved geometry is not just a design choice—it plays a structural role. The arch shape naturally distributes wind pressure and snow loads more efficiently than flat-roof buildings, reducing stress points across the structure.
Why Hoop Barns Are Used on Farms
Hoop barns have become increasingly popular in modern agriculture because they solve three major challenges for farm owners: cost, construction speed, and operational flexibility. Their simple structural design allows farmers to quickly create large covered spaces without the high investment required for traditional barns.
- Lower Construction Cost: Hoop barns require fewer raw materials and significantly less labor compared to conventional pole barns or steel-frame buildings. This makes them a cost-effective solution for farmers who need large covered areas without heavy capital investment.
- Fast Installation Time: Most hoop barns can be installed in a matter of days rather than weeks or months, especially when using pre-engineered kits. This makes them ideal for urgent agricultural needs such as livestock shelter or seasonal storage.
- High Functional Flexibility: Hoop barns can be used for multiple agricultural purposes without major modifications, making them suitable for evolving farm operations such as livestock housing, hay storage, or equipment protection.
- Natural Ventilation System: The open structure and fabric-based design allow continuous airflow, reducing heat buildup and improving overall livestock comfort while helping control moisture levels inside the building.
Expandable Design: Many hoop barn systems are modular, allowing farmers to extend the structure over time as their operations grow, making them a scalable long-term infrastructure solution.
Common Uses of Hoop Barns in Agriculture
Hoop barns are widely used across different farming operations due to their versatility, affordability, and ease of installation.
- Livestock Housing: Used for cattle, goats, sheep, horses, and other livestock requiring shelter with open space, ventilation, and weather protection.
- Hay and Feed Storage: Provides protection for agricultural feed from moisture, sunlight, and spoilage, helping preserve quality and reduce waste.
- Machinery and Equipment Storage: Offers covered space for tractors, harvesters, trailers, and other farm equipment that needs protection from environmental damage.
- Commodity and Grain Storage: Used for bulk agricultural storage where airflow and moisture control are important for preserving product quality.
- Seasonal Agricultural Operations: Often used for temporary or rotating farm needs such as calving, lambing, or seasonal grazing shelters.
Hoop Barn vs Traditional Barn (Key Differences)
Hoop barns are often compared with pole barns or steel-frame buildings. While both serve agricultural purposes, they differ significantly in cost, durability, and usage.
- Hoop barns are faster and cheaper to construct
- Traditional barns offer higher long-term structural rigidity
- Hoop barns provide better natural airflow and light diffusion
- Pole barns allow more permanent insulation and finishing options
- Hoop barns are more flexible for seasonal or expanding operations
In many modern farming setups, hoop barns are used as a scalable infrastructure solution rather than a permanent fixed structure.
Maintenance and Long-Term Care
Hoop barns are designed to be low-maintenance agricultural structures, but their lifespan and performance depend heavily on consistent upkeep. Unlike rigid buildings, fabric-based systems rely on tension, anchoring, and surface condition to remain structurally sound over time.
- Routine Structural Checks: Regular inspection of the steel frame helps identify early signs of wear, shifting, or corrosion. Although galvanized steel is highly resistant to rust, environmental exposure over time still makes periodic checks important.
- Fabric Condition Monitoring: The outer covering should be inspected for small tears, UV wear, or loosening caused by wind pressure. Early detection of damage prevents minor issues from turning into costly repairs or full replacement needs.
- Anchor and Foundation Stability: Ground anchors or concrete base systems must remain secure, especially in regions with freeze-thaw cycles or heavy rainfall. Loose anchors can reduce overall structural tension and compromise stability.
- Seasonal Maintenance Practices: Many farm owners perform seasonal tightening of fabric systems and clean debris buildup around the base of the structure to maintain proper airflow and drainage.
With proper care, a hoop barn can maintain reliable performance for many years while minimizing long-term repair costs.
Advantages of Hoop Barn Structures
Beyond cost and speed, hoop barns offer additional long-term operational benefits:
- Reduced maintenance compared to wood structures
- Improved lighting conditions due to fabric translucency
- Lower energy consumption due to natural light usage
- Adaptability for multiple agricultural functions
- Reduced material waste in construction
These factors make them particularly attractive for modern homesteads and commercial farming operations.
Key Takeaway
A hoop barn is a highly efficient agricultural building system that combines structural simplicity with functional versatility. It provides farmers with an affordable way to create large-scale covered space without the high cost, long construction time, or rigidity of traditional barn designs. Its clear-span interior, natural ventilation, and modular adaptability make it one of the most practical modern solutions for livestock and agricultural storage needs.
Frequently Asked Questions (FAQs)
What is a hoop barn used for?
A hoop barn is mainly used for livestock housing, hay storage, and agricultural equipment protection. Its clear-span design makes it ideal for farms that need large, open, and flexible covered space without internal support posts.
What is a hoop barn kit?
A hoop barn kit is a pre-engineered package that includes steel framing, fabric covering, anchoring systems, and hardware needed to construct a hoop barn. These kits are designed to simplify installation and reduce construction time for farm owners.
How long does a hoop barn last?
A well-built hoop barn can last 15 to 25 years or more, depending on fabric quality, installation accuracy, weather conditions, and regular maintenance such as tension checks and fabric inspections.
Are hoop barns cheaper than pole barns?
Yes, hoop barns are generally much cheaper than pole barns. They typically cost significantly less per square foot due to reduced material usage, faster installation time, and simpler structural requirements.
Can hoop barns handle snow and wind?
Modern hoop barns are engineered to handle specific wind speeds and snow loads depending on the region. Proper installation, tensioning, and anchoring are critical to ensure performance in harsh weather conditions
Do hoop barns need maintenance?
Yes, but maintenance is relatively minimal. Routine checks include inspecting fabric for wear, tightening tension systems, and ensuring anchors and frame connections remain secure over time.
What is the difference between a hoop barn and a hoop barn kit?
A hoop barn is the completed structure used on a farm, while a hoop barn kit is the set of materials and components used to build that structure.
Are hoop barns good for livestock?
Yes, hoop barns are widely used for livestock because they provide good ventilation, natural light, and large open space, which improves animal comfort and reduces heat stress.